
Tech
Everything You Need to Know for Restoring Your Car
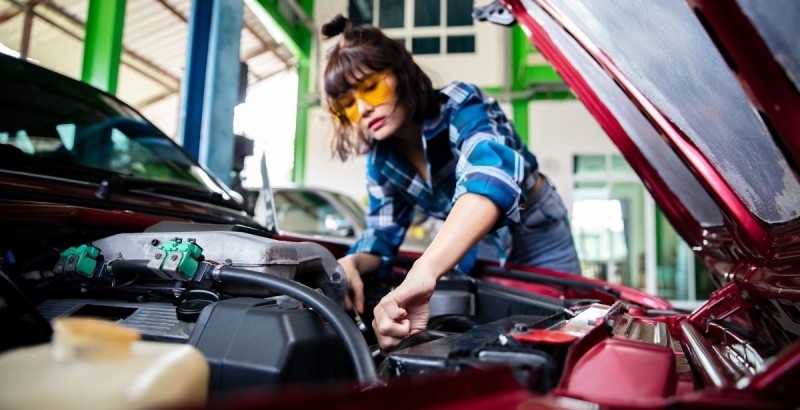
Restoration is quite challenging and complicated, but sometimes it becomes easier with appropriate service and choices. Our curiosity and envy are frequently piqued by old autos. Auto aficionados throughout the world are grateful for the vision, commitment, and expense that go into restoring one of these mechanical marvels. Just be aware that restoring an automobile entail reviving and fixing every component, from the paint to the engine. You can frequently locate a car with certain systems and cosmetics still intact if you look carefully.
This automobile restoration guide offers a straightforward, step-by-step procedure to restore your car properly. Remember that this straightforward guide will give you alternatives if working on intricate engine bays isn’t your strong suit.
Step 1: Creating a plan
Making a plan is the most crucial step in restoring a car. This will help you have a clear picture of the entire procedure, including how much it will cost, how long it will take, and how you will carry it out. It’s a fantastic chance to picture your finished product and lay out your aims for getting your ideal car. The plan consists of more than just a single element. It includes more than one element. Here are some of the elements that you need to know:
- Budget
Determine the total amount you want to spend on the project, and then divide it into the costs for the car’s various parts. Set aside a little extra money in case of any errors or unanticipated events.
It’s crucial to avoid skimping on particular components because they will strongly influence the end product, just as potential purchasers will want to know personal details about the car.
- Location
You’ll need to decide where you can store your car, which way it faces for simple access, and where you’re going to put all its parts when it’s been disassembled because it will be sitting in one place for a while. It is best to set up two distinct spaces: one for mechanical and bodywork and the other for electrical and upholstery.
- Record everything!
Take images and videos of everything before, during, and after the stripping phase. It’s nearly impossible to recall how everything fell apart. Make a list of the components and note which ones require replacement, maintenance, or painting. Further, label everything as well because doing so will help you save time during rebuilding. This can also be a wonderful selling point for potential customers who are curious about the process used to do the service.
- Timeframe
Make a schedule outlining how long the project will take and how much time you will be able to devote to it. Set attainable targets along the way, and be realistic with your timeline. You can divide the project into four sections: mechanical, electrical, body, and upholstery, to make the restoration procedure simpler. Set up two distinct spaces with the body and electronics in one and the upholstery in the other. You can work on two distinct projects at once.
- Obtain assistance from experts
Get in touch with the professionals before you start tearing things apart, whether you’re undertaking a thorough restoration yourself or hiring a professional. Make a list of any businesses or individuals you need to get in touch with and let them know your plans and deadline so they can make any necessary preparations and avoid delays.
Step 2: Start Execution by removing parts
- Interiors are stripped
It should be kept in a secure, spotless location, away from dirt and dust. Keep any broken items around because you will need them to compare when purchasing replacement parts. If it needs to be replaced, remember to put a note about it on your checklist.
Remove your dash completely with the instruments still mounted; if not, remove each piece individually and mark the locations of all wires.
- Disconnect all wiring
Once the wire has been removed, it is crucial to mark everything because it might become quite complicated. Note any cables that are broken and need to be replaced. Additionally, remember to work on the engine gearbox! Remove the transmission and gearbox from the engine. To prevent a mess, be sure first to drain out all liquids. An engine crane will simplify this entire process. As you remove wires from the engine, remember to label them and document each step with a photo.
Taking additional care to avoid breaking any clips because they can be challenging to find and replace, including bumpers, wings, trims, and clips. Remove the hood, boot lid, and doors with care, and mark the hinge edges to make it easier to reinstall them afterward. Moreover, the windscreens on the majority of historic cars are often secured in place by a rubber seal that dries up with time and becomes brittle. Since you probably won’t be using the same ones, the simplest approach to get rid of them is to slice the rubber seal with a Stanley knife.
Furthermore, if you want to know more about the Heavy machinery service manual, then you need to go and check Heymanuel.com for more detailed information.
- Take off or shield your headlights
Ask a professional for a UV Protected Headlight Restorations before re-fitting them if they appear faded and lifeless.
Remove the steering rack, brakes, front and rear suspensions, and other associated components. Make sure to record what needs to be fixed or replaced. Also, spend some time placing any replacement parts orders or making arrangements with any of the professionals on your list from the planning stage. Make a list and try to acquire all of your parts from the same place to simplify and reduce the expense of the process overall.
Step 3: Start with your looks
- Remove all of the paint
The simplest method is to blast or soak the entire shell in acid to remove the paint. However, you might need a professional. If not, there are three do-it-yourself paint removal solutions to consider.
Even though it takes a lot of time, using a wire brush on an electric grinder is your best alternative. The paint can be removed completely by sanding; however, it can be challenging to reach crevices. Utilizing paint stripper is the third alternative, but it’s messy and not quite as efficient as the other two.
- Take out dents and rust
There are three techniques to deal with rusty parts, but they can be a very time-consuming process.
Removing rusted pieces and replacing them with freshly welded steel is the best but most expensive alternative. You can choose to DIY, which would take just as much time. Replace all removable panels, including doors, bonnets, boot lids, and spoilers, as another alternative. The main difficulty with this solution is finding rare parts. While removing the rust and treating it is a quick fix option, it will only postpone the problem and is not advised.
- How to prepare for painting
Before we move on to the painting stage, you will fill, prim, and sand. There is filling where there is welding. To seal the metal and give it a good key, plug any holes and use an etch primer. In order to get a smooth, professional finish free of dust and dirt particles, make sure to wash off the panels at each stage.
Additionally, using 500 grit sandpaper, softly sand the primer; be careful not to sand back too much, or you will have to repeat the previous procedures.
Step 4: Start working on engine
You will need to pick which components will be replaced based on your budget. You should replace all external seals and gaskets to stop any potential leaks.
For added peace of mind, consider replacing the water pump and timing belt while the engine is out. These components can be costly and time-consuming to replace. Other components to consider are the installation of an intercooler kit, turbo, and fuel pump. When looking for a new engine with low mileage for an engine swap, be sure to do your homework.
Conclusion
After completing all the steps, you have read about restoring, your car is ready for the test drive! While following the article, you can restore and get your dream car. When you open the door, that intoxicating new car smell greets you. When you start using the automobile, any little flaws will become evident, so keep your eyes open on them. Verify that everything is in good working order, including the radio, air conditioner, heater, brakes, lights, windows, dashboard, and other dash instruments.


Brazil vs Morocco, 2026 FIFA World Cup – Preview, Prediction, Head to Head, Predicted Lineups, Team Squads and More

Will the August 2026 Partial Lunar Eclipse Be Visible in India?

Qatar vs Switzerland, 2026 FIFA World Cup – Preview, Prediction, Head to Head, Predicted Lineups, Team Squads and More

Alicia Lacao-Green gains worldwide fame owing to her amazing transformations via make-up and contouring.
Amplifyou, an amazing agency for eCommerce
Vasid Qureshi, India’s Top Blogger Shares 5 Tips to Go Viral on Social Media

Brazil vs Morocco, 2026 FIFA World Cup – Preview, Prediction, Head to Head, Predicted Lineups, Team Squads and More
Record five-time world champions Brazil will aim to begin their 2026 FIFA World Cup Group C campaign with a victory...

Will the August 2026 Partial Lunar Eclipse Be Visible in India?
The year 2026 has become especially significant for astronomers and skywatchers, with four eclipses scheduled throughout the year. Two eclipses—one...

Qatar vs Switzerland, 2026 FIFA World Cup – Preview, Prediction, Head to Head, Predicted Lineups, Team Squads and More
Qatar will be aiming to secure their first-ever World Cup victory when they face Group B favorites Switzerland in the...


NFL Releases Full 2026 Preseason Schedule and Key Dates With Hall of Fame Game in Canton
It has been 115 days since the Seattle Seahawks captured the Super Bowl title. Fortunately for football fans, the wait...
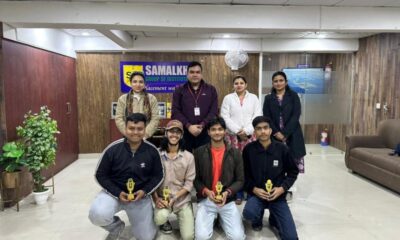

Bhartiya Parampara Gyan Quiz Strengthens Awareness of India’s Cultural Heritage Among SGI Students
In an effort to promote awareness of India’s rich cultural legacy and traditional knowledge systems, Samalkha Group of Institutions successfully...
-

 Entertainment3 weeks ago
Full List of Performers and Presenters for the 2026 American Music Awards
-

 Sports4 days ago
South Korea vs Czechia, 2026 FIFA World Cup – Preview, Prediction, Head to Head, Predicted Lineups, Team Squads and More
-

 Fashion3 weeks ago
Self-Funded and Scaling: Inside the Rise of Fleur Couture
-

 Entertainment4 weeks ago
2026 BET Awards Nominations: Full Nominees List and Top Categories Revealed
-

 Sports3 weeks ago
2026 College Station Regional: Bracket, Schedule, and How to Watch
-

 Festivals & Events4 weeks ago
International Day of Light: History and Significance of the Day
-

 Business2 weeks ago
Amwhiz Launches All-in-One Shopify Solutions for Ecommerce Businesses Across India
-

 Tech3 weeks ago
Spotify Launches AI-Powered Audiobook Publishing Tool With ElevenLabs Integration