
Science
Want to Capture Meteors and Meteor Showers? How to Photograph and Take Pictures of the Moon and Aurora
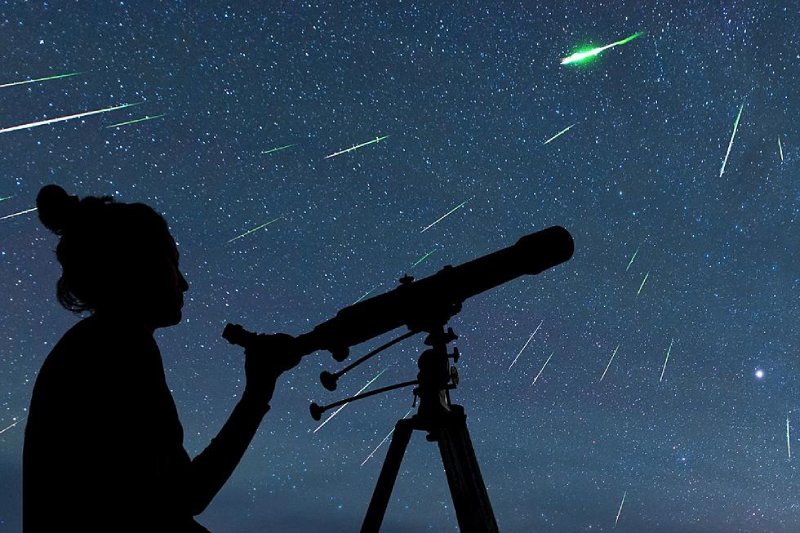
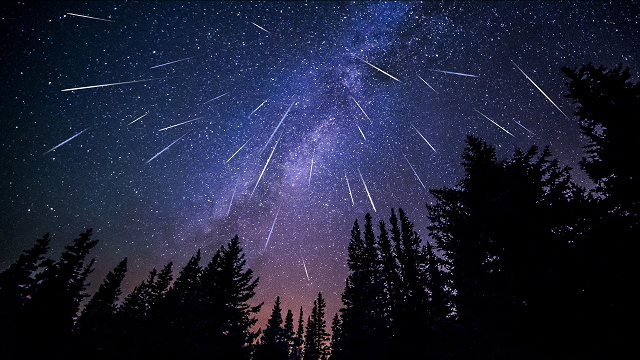
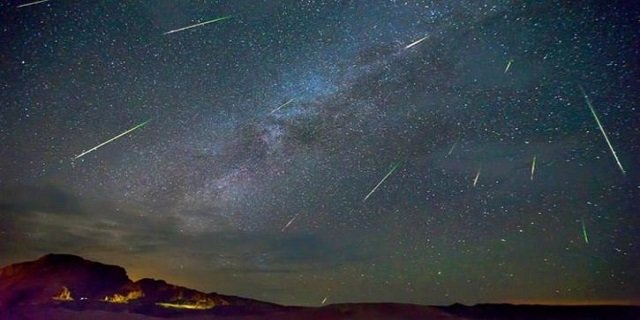
Some of the most fascinating sights in the night sky are meteors and meteor showers, but taking pictures of them can be very challenging. Once upon a time, obtaining a respectable shot would have required expending a substantial amount of money on film rolls and processing costs. To obtain a high-quality shot in such a short amount of time would have been challenging even with that knowledge. Any astrophotographer can find great subjects in the streaking meteors across the night sky. You can get the best shots of them by following our guide.
Fortunately for us, there is a plethora of technology available today that you can use to improve your chances of obtaining the breathtaking meteor image you’re looking for. This guide will assist you in arming yourself with the information and strategies you need to succeed. With these tools at your disposal, you should be able to return home from your nighttime shoot with a collection of striking photos to share, even though getting the ideal shot is sometimes still a matter of luck.
Among the many tools to help you improve your night sky photography is our guide on photographing meteors. We also offer advice on how to take pictures of the moon and a how-to guide for photographing the aurora borealis.
CHOOSING A METEOR SHOWER
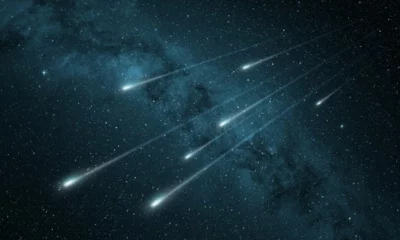
For the best chance of photographing a meteor, it’s helpful to know a little bit more about what they are. While lone meteors are possible, you’ll probably want to concentrate on meteor showers, which happen when tiny space rock particles known as meteoroids fly into the Earth’s atmosphere at extremely high speeds.
“Shooting stars” are the bright streaks of light that appear across the sky as a result of the majority of these fragments burning up upon entry. The spectacular light show that is visible from Earth is caused by meteors that are traveling through our atmosphere at speeds of up to 48,280 kph (30,000 mph) and heating up to temperatures of about 3,000 degrees Fahrenheit (1,648 degrees Celsius).
Astronomers can forecast when one of these meteor showers will occur based on the timing of Earth’s passes through the dusty comet orbiting the Sun, since comets and asteroids are the primary sources of this rocky matter. In the night sky, as seen from Earth, the constellation closest to the meteors’ origin point is typically used to name meteor showers.
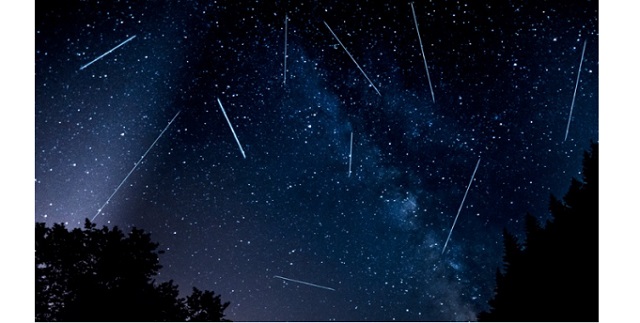
The Perseid meteor shower, which peaks in mid-August and originates in the Perseus constellation, is arguably the most well-known meteor shower. The Orionids, Leonids, Geminids, Taurids, Aquarids, Quadrantids, and Lyrids are some other notable meteor showers.
If you’re determined to take some amazing pictures of meteor showers throughout the year, there are several other excellent resources you might want to look into. A very comprehensive calendar of current and upcoming meteor showers is provided by the American Meteor Society. It includes information about the moon phase at the time of the shower’s peak as well as exact measurements for identifying the area of the sky from which the meteor shower will originate, or the “radiant.”
This is crucial information to know because your ability to view the meteor shower and the quality of your photos will be greatly impacted by the size of the current moon. If at all possible, select a time that falls on a new moon as a bright full moon will most likely outshine any fainter meteors. As with any astrophotography, you should also choose a dark location that is far from any sources of light pollution. Another very helpful tool for choosing the ideal time and location for your nighttime meteor shoot is the Photopills app.
WHAT DO YOU NEED?
After determining the best time to shoot, let’s quickly review the gear you’ll need:
Camera: A modern digital camera equipped with a manual mode. The best cameras are full frame, APS-C, and Micro Four Thirds.
Lens: The best lenses for meteor showers are wide or super wide-angle lenses. Remember that a shorter focal length will result in a wider field of view, which will raise your chances of getting a picture of a meteor. The best lenses for the job are those with the widest aperture of f/2.8 or less, which fall between 14 and 35mm for full frame or between 10 and 50mm for APS-C cameras. Aim for the lowest f-stop that is feasible. You can afford to stop down the aperture a little bit if it opens very wide, which will help to maintain star shapes and sharpness.
Tripod: To ensure steady shooting, the more robust the better.
Intervalometer: Since you’ll be taking consecutive pictures for a long time, you’ll need one. You can use the built-in intervalometer in certain camera models, or you can use an intervalometer that plugs in. The majority of stores sell them for $20 to $40.
Lens/dew heater: Nothing is worse than shooting nonstop for a few hours only to discover that your lens has long since fogged up, ruining a lot of your shots. Even in the summer, it can get chilly at night, so throughout your photo shoot, make sure your lens is free of dew. A dew heater is a heated element that encircles your lens to prevent dew and keep it warm. It runs on batteries. Once more, the price range for these is only $20 to $30.
Power bank and extra battery: Especially in the winter, continuous shooting will drain your battery, so be sure to have a backup in case you run out of power. To enjoy more hours of shooting and be able to charge your devices while on the go, you might want to get one of the best power banks.
Warm clothes: If you’re not outfitted for the weather, spending hours in the cold is not enjoyable. To stay warm and comfortable, wear layers.
WHERE SHOULD I POINT MY CAMERA?
Anywhere in the sky, meteors can be seen. The “radiant” is the point in the sky where meteor showers appear to originate, as we previously discussed. To find the radiant’s location for the time and date of the meteor shower you have selected to shoot, use the available phone apps and web tools.
Despite the allure, avoid pointing your camera straight at the radiant since the closest meteors will look insignificant and small. Rather, align the radiant concerning the frame’s edge, approximately 40 to 60 degrees away from the radiant. Your wide-angle lens should capture a lot of sky when aimed at an angle of about 60 degrees, along with some land for scale and interest.
CAMERA SETTINGS
Taking pictures of meteors is a lot like taking pictures at night in general. We won’t go into great detail about the settings here, but our guide on astrophotography for beginners has more information on suggested settings.
First, confirm that you are using Manual mode when shooting. Make sure you are shooting in RAW file format if you intend to post-process your photos. If you are not going to process your shots, then the large JPEG file format is OK.
After you’ve framed your sky composition, manually focus by digitally zooming into a star or far-off light source using your camera’s Live View feature. If you have a dew heater, it’s a good idea to do this so that the focus point is not inadvertently moved when it’s attached. To stop the focus ring from moving, you can also apply tape to your lens.
Use the ‘500-rule’ to determine your shutter speed when your lens aperture is at f/2.8 or smaller. Take a few test shots to determine what works best for your location, then start with an ISO of 3200 or 6400 and adjust from there. Turn off Long Exposure Noise Reduction (LENR) if it is activated on your camera. The best meteors will undoubtedly pass you by while your camera produces a noise-reduction frame!
Now you’re ready to take action! To increase your chances of capturing a streaking meteor or fireball, set your intervalometer to run for as long as possible, with 2 or 3-second intervals between exposures. As your camera works hard, settle in, take a seat, and enjoy the celestial entertainment!
CREATIVE IDEAS FOR YOUR METEOR IMAGES
If you’ve followed all of the instructions for your photo shoot, your memory card should be filled with numerous shots, ideally featuring multiple meteors and, with luck, perhaps even one or two fireballs. If you are using post-processing on your photos, you can combine several meteor shots into one picture so that the meteors in your composition all point back to the radiant. As an alternative, you could use a stack of your photos to make a star trail, or even make a beautiful nighttime time-lapse.


Building Investor Confidence: Imran Latif’s Journey in Dubai Real Estate

Czechia vs South Africa, 2026 FIFA World Cup – Preview, Prediction, Head to Head, Predicted Lineups, Team Squads and More

Ghana vs Panama, 2026 FIFA World Cup – Preview, Prediction, Head to Head, Predicted Lineups, Team Squads and More

Alicia Lacao-Green gains worldwide fame owing to her amazing transformations via make-up and contouring.
Amplifyou, an amazing agency for eCommerce
Vasid Qureshi, India’s Top Blogger Shares 5 Tips to Go Viral on Social Media

Building Investor Confidence: Imran Latif’s Journey in Dubai Real Estate
In Dubai’s really competitive real estate scene, building a reputation that rests on trust, consistency, and an investor-first kind of...

Czechia vs South Africa, 2026 FIFA World Cup – Preview, Prediction, Head to Head, Predicted Lineups, Team Squads and More
Czechia and South Africa endured disappointing starts to their FIFA World Cup campaigns, with both sides suffering defeats in their...

Ghana vs Panama, 2026 FIFA World Cup – Preview, Prediction, Head to Head, Predicted Lineups, Team Squads and More
After missing out on AFCON 2025, Ghana will be eager to respond on football’s grandest stage as they begin their...


England vs Croatia, 2026 FIFA World Cup – Preview, Prediction, Head to Head, Predicted Lineups, Team Squads and More
England and Croatia face off at Dallas Stadium in Arlington in their opening group-stage fixture of the 2026 FIFA World...


Portugal vs DR Congo, 2026 FIFA World Cup – Preview, Prediction, Head to Head, Predicted Lineups, Team Squads and More
Cristiano Ronaldo’s Portugal get their 2026 World Cup campaign underway against DR Congo in Houston on Wednesday. With Colombia and...
-

 Entertainment4 weeks ago
Full List of Performers and Presenters for the 2026 American Music Awards
-

 Sports1 week ago
South Korea vs Czechia, 2026 FIFA World Cup – Preview, Prediction, Head to Head, Predicted Lineups, Team Squads and More
-

 Fashion4 weeks ago
Self-Funded and Scaling: Inside the Rise of Fleur Couture
-

 Sports4 weeks ago
2026 College Station Regional: Bracket, Schedule, and How to Watch
-

 Business3 weeks ago
Amwhiz Launches All-in-One Shopify Solutions for Ecommerce Businesses Across India
-

 Tech4 weeks ago
Spotify Launches AI-Powered Audiobook Publishing Tool With ElevenLabs Integration
-

 Sports1 week ago
Mexico vs South Africa, 2026 FIFA World Cup – Preview, Prediction, Head to Head, Predicted Lineups, Team Squads and More
-

 Entertainment4 weeks ago
Crunchyroll Anime Awards 2026: Full List of Winners